
If your rental property vacancy listing doesn’t offer a walk-through video, you could be missing out on valuable potential tenants. Today’s renters are looking for online experiences, including videos of properties, to help them narrow down their in-person viewing options. And while quality photos are still important to the process, it’s the video that will offer the feel of your rental property. Don’t be nervous about creating these walk-through videos, either. Your smartphone will work just fine if you follow these tips.
1. Explore the Property Before you Record
Imagine you’re walking a new potential tenant through your space on a dry run first. You can then hit “record” and repeat the process, viewing rooms and property features within the same order. Doing a walk-through before creating a video will also help you mentally prepare to vocally narrate the virtual tour, pointing out the unique fireplace, vaulted ceilings, or newer appliances like you would if you were offering the tour in person.
2. Best Lighting in Each Room
You can’t always predict the sun, but you don’t want to create a walk-through video that’s darkened or not well-lit. Instead, open the curtains and turn on the lights. See which angles make the kitchen look brighter and shoot from there. Brightly lit closets will seem more prominent, too, as will other smaller spaces throughout your property. Lighting matters in these videos, so don’t be afraid to come back on a sunny day to try again if you don’t feel it’s just right.
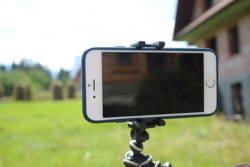
3. Keep a Steady Hand
Don’t post a walk-through video that might seem too jumpy or may inspire a queasy stomach. When recording, be as steady as possible with your phone or camera. Pan slowly from side to side or from down to up to capture the space entirely. Keep the angles viewing from your general height or vantage point and maybe incorporate visuals from an upstairs looking down into an open room to showcase spaciousness. Use tripods if you have them for more panoramic scenes. And if you still struggle to keep a steady hand, try to shorten the video length to brief snippets of motion that you can control.
4. You Don’t Have to Talk
You don’t have to be a whiz at video editing or design to mute background noise. If you don’t want to narrate your video, you don’t have to, so long as you drop in a complementary background of free use music. You can find online music resources here, making a video upload easy to dub-over for a more pleasant experience. And there are great online tools for even the most beginner of users to help you download, edit, and polish videos for posting.
5. Show Them What They Want to See
When you make your rental property walk-through video, create a checklist of property amenities you want to include. You don’t have to feature every detail. But be sure to include what renters want to see, like the kitchen, size of the den, bathroom layout, and backyard fencing. And always start or end your video with a curb appeal view of your property, as if you just arrived. This will provide that “first impression” look at your property’s best features, hopefully prompting viewers to want to see it in person.
You don’t have to be a videographer savant to create great walk-through videos that work. A smartphone or digital camera is all you need to get started. And these tips should help get you recording with your best foot forward. But if you still need help with your rental property listings, video and pictures included, contact us! Our professionals can help take the guesswork out of these marketing must-haves and the anxiety out of creating those ever-popular walk-through videos.